Why this Project 🔗
One of my goals going into this year was to reignite my excitement for technology. This decade has brought about an existential crisis in how I feel about technology and our society. I do make my living in the technology space and the irony is not lost on me.
I had considered learning a new programming language as a possible goal, but that can be a challenge when you don’t have a useful project to use it for. I went onto hacker news to see if anything would catch my eye and I was not disappointed. I found this Blinkenlights project.
Blinkenlights have a special place in my heart because of my fondness for the BeOS and the original BeBox which had a series of lights on the case that showed the duel processor load visually. There is something goofy and retro about Blinkenlights that is almost like art.
This idea also goes well beyond slinging code. This is applying what I know in the digital space and bridging the gap into analog. The analog has given me joy in the past several years, so this really strikes a wonderful chord of working with my hands using some new and interesting technology as the magic.
Research 🔗
The question becomes how to control the lights. I researched the Arduino controllers. This seemed like a possible choice, but then I came across a few videos on controlling LED’s with a Raspberry Pi. An added benefit is the Raspberry Pi Zero W 2 is only $15 and includes wireless capability.
I didn’t really know about the GPIO capability before coming across a few videos.
General Design 🔗
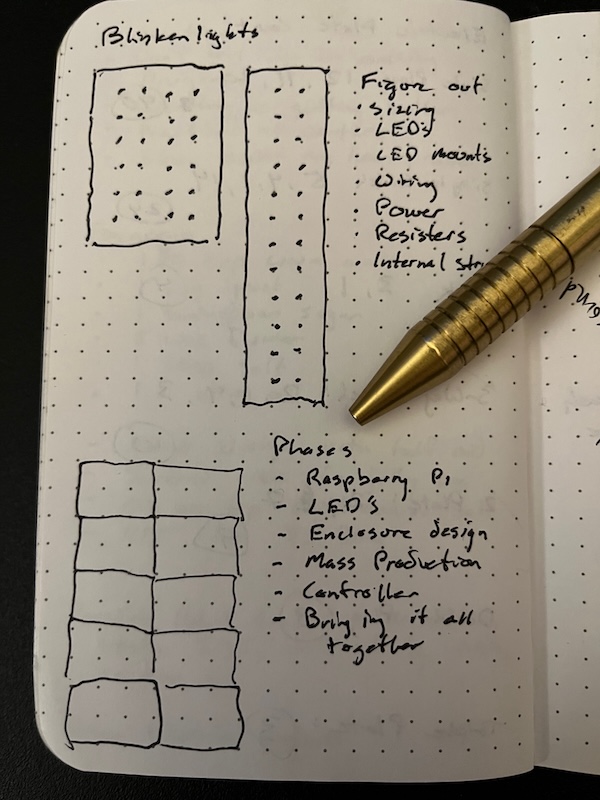
Now that I had an idea of how I would control the LED’s with a Raspberry Pi, I put some thought to an overall strategy. I could get at most 28, so went with a more even number of 26 LED’s per Raspberry Pi. At the low cost, I decided I would use several of them to independently control panels of LED’s.
I figured I could use Nomad to then cluster these and coordinate a more intricate LED pattern if I wished. I played with how the LED’s would lay out, either long-ways or maybe more tighter rectangle. I finally decided on a 4 x 6 layout to do some interesting things.
Initial Parts 🔗
I was able to visit a local Micro Center to pick up some of the Raspberry Pi components. They are much more reasonably priced than Amazon. I also required a few tools as my soldering iron was cheap, old, rusty, and not maintained well. Additionally I used this project to get some proper wire strippers.
Raspberry Pi Zero W 2 with Heads $17.99
Raspberry Pi Power Supply $7.99
256 GB MicroSD Card $20.99
Mini HDMI to HDMI Cable $13.99
Micro USB to USB Adapter (2 pack) $6.49
10 Solderable Breadboard (10 pack) $16.99
5mm Red LED diode lamp (100 pack) $5.99
5mm Plastic LED Holder (100 pack) $6.99
330 ohm Resistor (100 pack) $5.99
Dupont Crimping Tool $22.29
Dupont 1-Pin Male Adapters (100 pack) $6.99
Dupont 1-Pin Female Adapters (100 pack) $8.99
400 Point Breadboard Kit (6 count) $6.99
20 Gauge Wiring (100 ft) $14.18
Solder Iron Kit $37.98
3oz Solder $17.98
Helping Hands Soldering Station $17.99